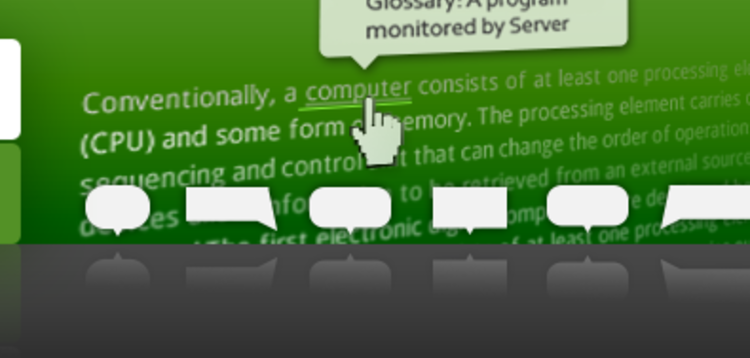
Easily create a glossary of terms that appear both in a popup tooltip on mouseover and in a term post.The Tooltip Glossary plugin can integrate external glossary data from Wikipedia, dictionaries and thesauruses.
In-Depth Tooltip Glossary – Boost Your Site SEO and Readability
The CM Tooltip Glossary is an outstanding WordPress tooltips plugin that allows any website to host its own glossary of terms and definitions, and display them in an easy and engaging way.
PopUp Tooltip
Upon defining a glossary term in the glossary, each occurrence of it will become highlighted across all posts and pages.
Hovering over words defined in the glossary will display a pop-up tooltip containing the summarized definition of the term and a link to a dedicated term page.
Glossary Index Page
A Glossary Index page is automatically created by the plugin. Here all the terms in the glossary are listed.
Available formats include a search option, a localised alphabetical navigation bar and the list of all terms and definitions. The Pro+ edition includes 10 different designs for the index page.
Term Page
Each term in the glossary has it’s own dedicated term page which includes the term definition.
Images and can also aggregate content from external sources such as WikiPedia and Merriam Webstar dictionary and thesaurus.
Related Terms
Glossary terms pages are all linked together through a related terms mechanism, as well as through a central index page.
This helps to create a strong infrastructure for enhancing a site’s SEO. Term pages also show the Related Articles that uses the glossary terms.
Synonyms, Abbreviations and Variations
Each tooltip term pop-up can support synonyms, abbreviations and variations. Using these enhances the scope of the term search within your content and the ability to use it in many different ways.
Additional tooltip features for the WordPress tooltips plugin include the ability to include/ exclude certain terms from a page or post, using multiple glossaries within the same website, create an explanatory dictionary, add media files to a tooltip and adjust the look and feel of all glossary terms sections.
Using the WordPress Glossary Plugin for WordPress
- Complete Glossary – Easily create an A-Z in-depth Glossary of terms to clarify meanings or context of your site’s content
- Popup Tooltips – Place term definitions, images, videos, or any html content inside pop-up tooltips that appear when words are hovered over
- Internal Backlinks – Automatically generate pages and backlinks within your site to enhance SEO connectivity and UEX
- Integration with External API – Integrate external APIs that draw definitions from Wikipedia, Google translate and Merriam Webster dictionary
- Amazon affiliate – Promote products by displaying Amazon affiliate links and WooCommerce descriptions in hovering tooltips
- Filter Post Terms – Customize responsive tooltips for specified pages and posts using include/exclude, whitelist/blacklist and other useful hacks
- Tooltip Shape and Color – Shape the tooltip look and feel by determining the tooltip background color, font color and more.
Who can benefit from our WordPress In-Depth Glossary?
- WordPress site owners who wish to simplify complex professional terms within their content
- WordPress bloggers who wish to neatly display and track affiliate links or product recommendations
- WordPress marketers who wants to increase SEO juice and generate content
How Does the WordPress Glossary Promote your website SEO
- Generate Internal Links – The Glossary Plugin gives you the ability to automatically create links to the glossary pages from existing blog or article pages. This means within seconds, you have the ability to create hundreds of backlinks to the term page from within your site.
- Integrate with External Resources – You can easily add multiple sources to each term, which again, is a great way to strengthen your SEO.
- Build Terms Page with Valuable Information – The Glossary Tooltip creates a post for each term in the glossary. This draws users into your site while searching this terminology in Google.
Tooltip Glossary Localization, WPML and Language Support
Easily Localize Glossary Interface
All frontend labels can be easily changed to any language so the user interface will speak your language. This also includes the Index page letter list.
To activate the plugin follow the instructions below:
1) Go to License section inside the CM Custom Reports Pro.
2) Uncheck the option “Connect to CreativeMinds server (license activation / deactivation, update checks, special offers)”
3) Inside the license key input field, enter “valid” without the quotes and click “Save Change & Activate”


